Halloween crafts aren’t just for young kids. Check out our Halloween Craft Ideas For Kids article for that. This Halloween, why not get crafty and make something chic for your home? Or make your Halloween celebration really stand out. Here’s our guide to the best Halloween craft ideas suitable for older kids and adults to make for this October 31.
Halloween Home Craft Ideas
DIY Gothic Candle Holders
As the evenings draw in, it’s the perfect time to bring candlelight into your home, just in time for the spooky season. Used wine bottles and old jam jars make great holders for long white candles or tea lights. You can make them look gothic for Halloween by using matte black spray paint. Options for the next layer of decoration include lace trim, which you could find in craft shops or charity shops, silver paint or pen, or start using them so the wax starts to dramatically drip down the side. Cluster your decorations together on a mantlepiece or shelf for an eye-catching look. Or they could be a central decoration on a dining table.
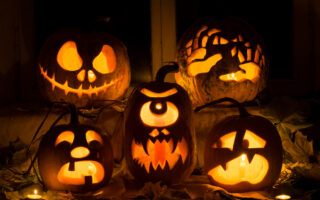
Pumpkins
Pumpkin carving needs to be handled with care whether you’re overseeing a child or you’re a fully grown adult! Be careful! To make your pumpkins last longer and to avoid sliced fingers, you could paint them instead. Metallic paints work well and look great against a black tablecloth. Fabric scraps or velvet also work well being tied around the pumpkins for a cosy and soft gothic effect.
Haunted Terraniums
Try this twist on the classic terrarium. Fill a glass vase or cloche with moss and twigs, then make it spooky with small plastic skeletons or spiders from the Halloween section at the supermarket or a craft shop. Draw attention to them with clusters of fairy lights to make them light up in the evenings. These also make excellent table centrepieces.
Halloween Party Craft Ideas: Handmade Invitations
If you’re hosting a Halloween party for friends, personalised crafted invites can add a special touch. Use black card, metallic pens, and wax seals for a gothic touch.
Themed Glassware
Glass etching kits can help you transform plain glass into something spooky. Black ribbons and charms around the stems of wine glasses can also be a nice touch. Make homemade cocktail stirrers with plastic bats, skulls or glittery spiders glued onto sticks.
Crafty photobooth
Set up your own DIY photobooth with witch’s hats, wigs and masks. You could decorate it by cutting out bats from black card, making spider webs from wool or even make streamers and paper chains in Halloween colours. Instagram-worthy Halloween photos will be yours in no time.
Halloween Craft Ideas For Costumes: Masquerade Masks
Clever crafts can save you money on buying shop-bought Halloween costumes. Plain masquerade masks are easy to buy in craft shops and easy to decorate and make look elegant. You could decorate it with lace, glitter, feathers or sequins. Black, gold and reds make good Halloween colours. You could also collage shiny materials or use paint to decorate your spooky masks.
Gothic Jewellery
Jewellery can turn any plain outfit into something Halloween-themed. For example, get a spider or some tiny skulls and make a necklace or earrings that can be used year-on-year or even given as Halloween gifts.
Re-use old clothes
Repurpose old clothes by taking the scissors to them for a Halloween look, stitch things together or use fabric scraps to change an old outfit. Red fabric paint can be splattered on white fabric to be a vampire or a zombie. A black dress with a handmade lacey cape makes a great witch’s outfit.
Halloween Tableware
Pick up some skulls from the Halloween section at the supermarket or a charity shop if you’re lucky and draw or paint on them to refresh them and make them unique. Dried black roses or black fake flowers can be wrapped around skulls to craft Halloween tableware. Another idea is to use red food colouring to a glass bowl of water and put eyeballs at the bottom!
You can also craft Halloween tableware such as napkins by using black lace or ribbon, small spider charms and add mini pumpkins to the table set up too. Painted glasses can be used as snack bowls or to hold tea lights.
Halloween Craft Projects: Macramé Ghost: Step-by-step
Cute, spooky and perfectly drapey, this macramé ghost is a quick project for beginners with a few simple knots. Below is a clear step-by-step outline you can follow (with options for simple or more refined versions).
Materials & sizing (choose based on desired finished size)
Dowel / branch: 20 to 30 cm (8–12″) for a small ghost; 35–50 cm (14 to 20″) for a bigger one.
Macramé cord: 3 to 5 mm cotton cord (soft natural cotton works best).
Cord lengths (guideline):
Small ghost (35 to 45 cm / 14 to 18″ finished): 12 cords × 1.8–2.0 m (6 to 6.5 ft) each.
Medium (60 cm / 24″ finished): 12 to 16 cords × 3 to 3.5 m each.
Tip: cut a little extra: macramé consumes cord in knots.
Extras: scissors, ruler/tape, comb (wide-tooth), optional small safety pin or clamp, felt or buttons for eyes, glue or needle & thread.
Quick knot refresher
Lark’s Head: fold cord in half, loop over the dowel and pull tails through the loop to attach.
Square Knot (alternating): common flat knot for macramé panels.
Wrapping/Gathering Knot: used to make the ghost’s head (wrap a short cord many times around a bundle and tuck/tie off).
Optional: Half Hitch / Diagonal Half Hitch: for shaping if you want a tapered body with neat lines.
Step-by-step
1. Prepare and attach cords
Cut your cords to length. Fold each cord in half.
Attach them to the dowel using Lark’s Head knots. For a classic look, attach cords evenly across the dowel so you have a thick curtain of cords hanging down.
2. Mark the head position
Decide where the ghost’s “head” will sit: usually the centre of the piece.
Count and separate the central 6 to 10 cords (depending on how big you want the head). These will be gathered to form the head; the remaining cords become the body/fringe.
3. Form the head with a gathering (wrap) knot
Take a short piece of cord (about 40 to 60 cm): this will be your wrapping cord.
Hold the central bundle together at the point where you want the top of the head to be (about 6 to 8 cm / 2½ to 3″ from the top for a small ghost).
Make a small loop under the bundle and start wrapping tightly around the bundle with the short cord: wrap 25 to 40 times depending on cord thickness. Keep wraps neat and tight.
After wrapping, thread the working end through the initial loop, then pull the short tail to tighten the wraps into a neat gathering knot. Trim ends and tuck under the wraps or secure with a dot of glue. (Alternative: tie a tight overhand knot around the bundle and secure: less neat but quick.)
4. Create the body (simple method)
Below the gathering knot, leave a short “neck” of straight cords (2 to 4 cm).
To give the ghost some structure, tie one row of alternating square knots across the next 6 to 10 cm (optional). This creates a subtle chest/shoulder area.
For a tapered ghost shape, trim the fringe into a gentle triangle: shorter at the sides and longer in the centre (or vice versa, depending on desired silhouette). Use a ruler and lightly mark before cutting.
5. (Optional) Shaped body with diagonal lines
If you prefer a neater, more designed shape, use Diagonal Double Half Hitch rows: anchor a working cord at one side and knot diagonally across the cords to make angled lines that taper toward the centre: repeat on both sides to form a triangle skirt.
This gives a cleaner, stylistic ghost silhouette instead of trimming alone.
6. Eyes and facial details
Cut two small black circles from felt and glue them on for eyes (or use black wooden beads or safety-eyes if the ghost is for decoration and not for small children).
For a more minimal look, embroider small black stitches or use permanent fabric marker. Placement: roughly 6 to 8 cm below the gathering knot for a balanced face.
7. Finish the fringe
Comb out the fringe below the body for a soft, wispy look (use a wide-tooth comb).
Trim the fringe to shape: either blunt across, rounded, or triangular taper. For a wispy, ghostly edge, point-cut small V-shapes into the ends.
Optional: wet the cotton slightly and let it dry to relax curls and fluff the fringe.
8. Hanging and display
Tie a length of cord to each end of the dowel or create a loop in the middle for hanging.
Hang against a wall, in a window, or suspended from the ceiling with clear fishing line for a floating ghost look.